Ja-pan literally translated from Japanese to mean Japanese or Japan bread or could also relate to the absolutely hilarious, punny (funny), and genius show called Yakitate!! Japan.

I am absolutely in love with this anime show about a tensai-pan or bread genius boy whom is passionate about bread making and tells of his story in wanting to create Japan's own bread to call of their own.

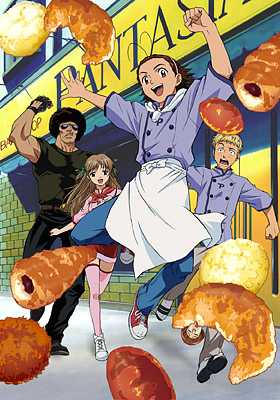
It's just too funny at times that I can almost die several times over from laughing at their over-the-top reactions, elaborate antics, crazy expressions and outrageous situations. What more could one expect from an anime that explores the world of competitive bread making and celebrating the lives of ludicrously but extravagantly portrayed bread artisans.

I'm almost a third way through with the show but I believe that it can only get better from here on till the end. Stay tuned for an update on this review.
Update!!
Well I finished watching the whole 69 episodes show of Yakitate!! Japan and overall I was satisfied and amusedly entertained throughout its entirety. Absolutely fun show to watch as the play on the Japanese words and phrases was used a lot resulting in many a crazy situations. There was not much suspense in the show as what other animes usually have but the multitude of pop culture references, parodies of other animes and even themselves, and continuously breaking the fourth wall with comedic and pitch perfect effect was what kept the show alive and different from other food-related anime shows.
I was just a bit disappointed with how the show ended as the last 3-4 episodes is actually not based on the manga and so it didn't feel like a proper ending to the series. The final episode was actually a bit of an anticlimax and I think the producers of the anime could have done a better job of wrapping up the series if they had worked a bit harder at tying up some loose ends. Even though the 69th episode was the last one, I felt that they actually left quite a wide opening for a continuation of the show if they wanted to.
The manga continued on from after the third last battle of the breads so there is a lot more to go and explore for the Japan team. I'll be looking forward to more madness from Kuroyanagi aka Kuro-yan, hilarity fromKappachi Kawachi, and geniusity from Azuma-kun!
I feel quite inspired to throw myself back into bread making but that horrible first time that I tried handling yeast was enough to set me back a few. But maybe with this show I'd be able to rekindle my love for bread and try it again. Hopefully I will soon enough and I'd be sure to blog about it. Just thinking of those yummy looking breads in the show like the many-layer-croissant,butter margarine roll, melon-pan, naan-pan, and lots of other different types of bread that you couldn't even possibly imagine.
I am absolutely in love with this anime show about a tensai-pan or bread genius boy whom is passionate about bread making and tells of his story in wanting to create Japan's own bread to call of their own.
It's just too funny at times that I can almost die several times over from laughing at their over-the-top reactions, elaborate antics, crazy expressions and outrageous situations. What more could one expect from an anime that explores the world of competitive bread making and celebrating the lives of ludicrously but extravagantly portrayed bread artisans.
I'm almost a third way through with the show but I believe that it can only get better from here on till the end. Stay tuned for an update on this review.
Update!!
Well I finished watching the whole 69 episodes show of Yakitate!! Japan and overall I was satisfied and amusedly entertained throughout its entirety. Absolutely fun show to watch as the play on the Japanese words and phrases was used a lot resulting in many a crazy situations. There was not much suspense in the show as what other animes usually have but the multitude of pop culture references, parodies of other animes and even themselves, and continuously breaking the fourth wall with comedic and pitch perfect effect was what kept the show alive and different from other food-related anime shows.
I was just a bit disappointed with how the show ended as the last 3-4 episodes is actually not based on the manga and so it didn't feel like a proper ending to the series. The final episode was actually a bit of an anticlimax and I think the producers of the anime could have done a better job of wrapping up the series if they had worked a bit harder at tying up some loose ends. Even though the 69th episode was the last one, I felt that they actually left quite a wide opening for a continuation of the show if they wanted to.
The manga continued on from after the third last battle of the breads so there is a lot more to go and explore for the Japan team. I'll be looking forward to more madness from Kuroyanagi aka Kuro-yan, hilarity from
I feel quite inspired to throw myself back into bread making but that horrible first time that I tried handling yeast was enough to set me back a few. But maybe with this show I'd be able to rekindle my love for bread and try it again. Hopefully I will soon enough and I'd be sure to blog about it. Just thinking of those yummy looking breads in the show like the many-layer-croissant,


